Frequently Asked Questions
What to Expect with Hardwood Flooring Installation or Refinishing
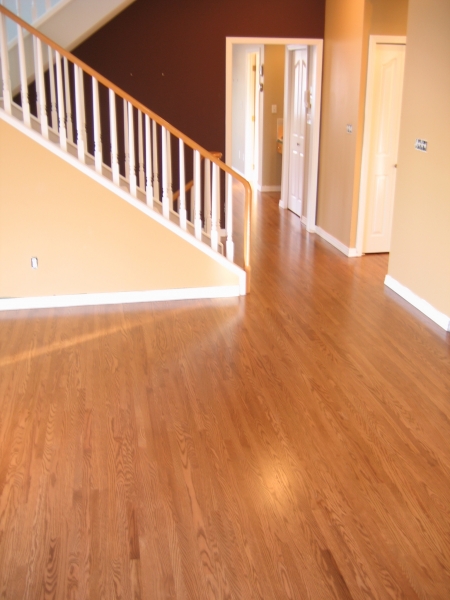
So you have chosen to install or refinish a wood floor in your home — congratulations!
You’re adding a beautiful, durable design element that will add real value to your home, and last for many generations to come. You may be wondering what will happen next, and may have some concerns about the disruption to your home while the work on your hardwood flooring is being conducted. Knowing what to expect before, during, and after the work takes place will help prepare you and your family for what the Summit Custom Hardwood technicians will be doing, and will need for you to do, to deliver a high-quality job.
First Steps
Before any work begins on your floors, the first step will be to remove all furnishings from the room. You also should remove any paintings or other decorative items from the walls, so that they are not accidentally knocked down while the wood and flooring equipment is being moved in and out of the room. If there are any appliances in the room, such as stoves, dishwashers or refrigerators, you should contact professionals from the gas company or water-company to disconnect any gas or water lines, and reconnect them once the work is completed. This will minimize the potential risk to you, your family, and your wood flooring professional.
Once everything is removed from the room, you should take the time to vacuum the floors if your existing wood floors are being refinished. This will aid in speeding up the process.
Acclimating the Wood
Now that your room is ready, the hardwood flooring will be delivered to your home to acclimate the new floors if you are having new hardwood flooring installed. Acclimation is an important step in the installation process, and is absolutely critical for a high-quality job. The time required for this step will vary from one day to two weeks, based on the wood species being installed, the living conditions of the home and the temperature and humidity. In new construction, all windows and doors must be in place, and all other trades such as painting, grouting, etc., must be completed before hardwood flooring can be installed.
Be sure you understand up front - each aspect of the installation process, from how long it will take, to which direction the hardwood flooring will be installed, to how the floor boards may vary in appearance.
Keep in mind that wood is a natural product, produced in a factory called a forest, and no two floorboards will be identical. Variations in appearance of your hardwood flooring is completely normal, and will add to the beauty and charm of real wood floors.
Though we use state-of-the-art processes to keep dust at a bare minimum, the installation process will generate some dust. You should cover any items that you want to keep dust-free.
Installing and Finishing
If your hardwood flooring is being sanded, finished or refinished on site, you need to be prepared for some noise and disruption. In terms of sanding, Summit’s Atomic DCS system is 99% efficient at capturing dust. Our vacuum units attach directly to the machines. Hoses will be run through the easiest access route to connect to the Atomic unit. In case of rain or during the winter, a special door threshold will be hung to reduce water entry and heat loss.
When your hardwood flooring is ready to have a finish applied, be sure you know what type of finish is being used. We want you to be satisfied with the finish sheen. If you don't like shiny finishes, you may want a satin finish. Your Summit Custom Hardwood contact will ensure that these options are covered in your initial consultation. No matter what the type or sheen, the process will move very quickly once the finish process begins. This is a critical phase - when the finish is being applied to your floors, you will have no access to the room until the finish has completely dried and has had time to cure. The time required will vary depending on the type of finish being used, humidity levels, and temperature. Regardless, pets should be contained, and all family members should be kept out of the room for the duration. We will let you know when you can walk on your floors, and when furniture can be put back into place.
After Installation and Finishing
Once you have been given the go-ahead to move back into your room, you should put felt pads on the bottom of any furniture that will come into direct contact with your hardwood flooring. This will help minimize scratches and dents on your new floors. To further prevent scratches, place scatter rugs at all entrances, avoiding those with rubber backs, which can discolour your floor. Finally, avoid walking on your hardwood flooring with cleats or high heels that are in disrepair. These can scratch the finish, or even dent your hardwood flooring.
As your hardwood flooring ages, you should expect some colour change to occur. Because wood is a natural product, it is prone to change appearance. In most cases, the change is quite subtle. Direct sunlight, furniture and rugs can cause colour changes as well, so try to move your furnishings and rugs from time to time to help minimize colour variations.
You should be prepared for spaces to appear and disappear between floorboards during seasons of high and low humidity. Being a product of nature, wood breathes and reacts to changes in humidity and temperature, which can cause temporary spaces in your hardwood flooring. Generally, anything less than the width of a quarter is considered normal, and in most cases, these spaces will correct themselves when conditions are more favourable. You can help minimize this situation by maintaining constant humidity in your home, within 20 percent.
Finally, to keep your hardwood flooring looking their best, you will need to properly care for and maintain them. Summit will recommend a cleaning product designed specifically for your type of floor. Use it regularly to keep your floors looking beautiful.


